
Introduction to the Digitalisation of Photo Albums
Part 1 of 2 is below. It runs continuously into Part 2, which will complete the article, FAQs, conclusion, meta description and social summaries.
How to Digitise a Photo Album Safely and Properly
To digitise a photo album safely, inspect its condition first, leave firmly attached photographs in place, capture complete pages before making individual image files, and avoid forcing the binding flat. Use a flatbed scanner for robust albums or an overhead camera for fragile, oversized and self-adhesive albums.
A reliable process involves:
- Checking the album, binding and photographs for damage.
- Deciding whether to preserve pages, individual pictures or both.
- Preparing a clean, stable workspace.
- Choosing a flatbed scanner or overhead camera.
- Capturing images at a suitable resolution and colour setting.
- Checking every file before moving to the next page.
- Organising, backing up and preserving the resulting digital archive.
- Storing the physical album in a stable environment.
The objective is not simply to produce a folder of image files. A good digital archive should preserve the photographs, their order, handwritten captions and the relationship between everything on each page. It should also reduce the need to handle the original album in future.
Why an Album Needs More Care Than a Box of Loose Photographs
A photo album is a complete historical object. The photographs matter, but so do their arrangement, annotations, page decorations and sequence.
A single page might contain:
- The only known date for a family event.
- A handwritten name that identifies someone in a group.
- A postcard or ticket that establishes a location.
- A note explaining the relationship between two people.
- A newspaper cutting connected to the photographs.
- A decorative arrangement created by a parent or grandparent.
Removing the pictures and scanning them as isolated prints may preserve the images while unintentionally discarding this context. That is why complete page capture should usually form part of the project, even when you also want separately cropped files.
Digitisation also reduces repeated physical handling. Photographs consist of several layers, including a support and an image-bearing surface. Oils and salts from skin can mark the image layer, while abrasion, prolonged light exposure and unstable temperature or humidity can contribute to deterioration. The National Archives’ handling guidance for photographic material recommends minimising direct contact, protecting vulnerable surfaces and maintaining the original order of a collection. (The National Archives)
A well-planned project therefore creates two forms of protection:
- A digital access copy, which family members can view and share without touching the album.
- A preserved original, which retains its physical character and historical value.
Decide What You Need Before You Start Scanning
Before choosing equipment, decide what the finished archive should contain. This prevents inconsistent results and unnecessary rescanning.
There are three useful approaches.
Complete Page Capture
This records every open page or individual album page exactly as it appears. It preserves layouts, captions and inserted keepsakes.
Complete pages are ideal for:
- Heritage albums.
- Scrapbooks.
- Wedding albums.
- Travel journals.
- Albums containing handwritten notes.
- Collections where the arrangement tells a story.
- Photographs that cannot safely be removed.
The disadvantage is that an individual photograph may occupy only a small portion of the captured page. It may not contain enough detail for a large print or extensive restoration unless the page is scanned at a sufficiently high resolution.
Individual Photograph Capture
This creates a separate image file for each print. You can produce these by safely removing loose photographs, scanning them individually or cropping them from a high-quality page capture.
Individual files make it easier to:
- Find a particular photograph.
- Share selected pictures.
- Create prints or photo books.
- Apply restoration selectively.
- Add names, dates and keywords.
- Sort images into several family collections.
The risk comes from assuming every print should be removed. A photograph that resists movement should stay where it is unless an experienced photographic conservator advises otherwise.
A Combined Archival Approach
For valuable albums, the strongest solution is often to create:
- A digital record of each complete page.
- Separate files for individual photographs.
- A written index linking each photograph to its original page.
For example, the full-page file might be named:
1976_Wedding_Album_Page_012
The cropped photographs from that page could then be named:
1976_Wedding_Album_Page_012_Photo_01
1976_Wedding_Album_Page_012_Photo_02
This method retains context while making individual images practical to use.
Assess the Album Before Handling It
Do not begin by opening the album as widely as possible. Start with a visual condition check on a clear table.
Support the album with both hands and examine:
- The front and back covers.
- The spine and hinges.
- The edges of the pages.
- Any loose inserts.
- The condition of plastic overlays.
- Areas of damp, staining or mould.
- Photographs that have already lifted.
- Cracked, flaking or sticky surfaces.
- Rusting staples, clips or metal corners.
- Handwritten labels that could detach.
Open it gradually and stop when the binding begins to resist. Bound volumes should not be forced flat because pressure at the joints and spine can damage the structure. Guidance for handling vulnerable volumes specifically warns against placing a volume flat and forcing it open. (The National Archives)
Warning Signs That Require Extra Caution
Pause the project if you notice:
- A strong musty smell.
- Visible fluffy, powdery or spreading mould.
- Wet or recently water-damaged pages.
- Photographic surfaces sticking to facing pages.
- Image layers lifting or flaking.
- Pages cracking when moved.
- A binding that separates as the album opens.
- Glass, metal or unusually old photographic formats.
- Insect activity or debris.
Do not brush active mould indoors or use a household vacuum on the album. Mould can present a health risk and careless cleaning can spread spores through the collection and room. Isolate the album from unaffected materials and seek conservation advice where the contamination appears active or extensive.
Should You Wear Gloves?
For loose photographic prints, thin nitrile or vinyl gloves can protect the image surface from skin oils and salts. The National Archives advises using these glove types for loose photographic material and notes that cotton gloves may reduce dexterity or shed fibres. (The National Archives)
An album presents a slightly different handling problem because you need sufficient grip to turn pages without tearing them. Use clean, dry hands for robust paper edges if gloves make page turning unsafe, but avoid touching photographic surfaces. For loose prints, negatives and slides, use close-fitting powder-free nitrile gloves and hold items by their edges.
Remove watches, bracelets and rings that could scratch photographs or catch on a damaged page.
Identify the Type of Photo Album
The safest capture method depends on how the album was made. A technique that works for a modern pocket album may seriously damage an older self-adhesive book.
| Album type | How to recognise it | Safest general approach |
|---|---|---|
| Pocket album | Prints slide into clear plastic sleeves | Capture complete pages; remove only prints that slide out freely |
| Photo-corner album | Corners of each print sit in paper or plastic mounts | Scan pages first; remove prints only if the corners remain flexible |
| Traditional pasted album | Prints are attached directly to card or paper | Keep photographs in place and capture the full page |
| Self-adhesive album | Tacky page beneath a clear plastic overlay | Do not pull at resistant prints; scan or photograph the page intact |
| Scrapbook | Mixed photographs, writing and memorabilia | Use full-page overhead capture where possible |
| Ring-bound album | Removable or hinged pages held by rings | Remove pages only if the mechanism operates safely |
| Flush-mount album | Thick photographic pages bound as a book | Use overhead capture and support the binding |
| Heritage album | Older construction, brittle pages or unusual photographic processes | Minimise handling and consider professional assessment |
Pocket Albums
Pocket albums appear straightforward, but the plastic can become cloudy, scratched or stuck to the photograph. First capture the page as found. This records the order and protects against mix-ups.
Then test one unimportant photograph. If it slides out without flexing or catching, you may scan it separately. Stop if the print sticks, bends or drags against the sleeve.
Albums With Photo Corners
Photo corners often allow safe removal, provided they remain flexible. However, aged paper corners can become brittle and detach with very little movement.
Capture the page first. Lift only one corner at a time and support the print rather than pulling it diagonally. If the mount begins to tear, leave the photograph in place.
Pasted and Self-Adhesive Albums
Never assume old adhesive can be released safely with heat, moisture, solvents, dental floss or a palette knife. A print may look loose along one edge but remain firmly bonded elsewhere. Pulling it can split the paper support, crease the photograph or disturb the image-bearing layer.
In most household projects, the safest response is simple: leave the photograph attached and create the best possible digital capture of the page.
Albums with clear overlays can present glare, yellowing and surface texture. Overhead capture with carefully placed lights often produces better results than pressing the page against scanner glass.
Scrapbooks and Mixed-Media Albums
Scrapbooks may contain photographs alongside cards, letters, fabric, pressed flowers, tickets and folded items. Their uneven surfaces rarely sit safely on a flatbed scanner.
An overhead camera allows the book to remain face-up and gives you space to support thick or three-dimensional pages. It also preserves the visual relationship between the items.
For collections dominated by layered keepsakes, specialist handling for complex memory books may be more appropriate than trying to flatten or dismantle them at home.
Should You Remove Photographs From an Album?
Remove a photograph only when it can be released without force and without damaging its mount, page or surface. If there is resistance, leave it in place.
That direct rule prevents many avoidable losses.
A photograph may be suitable for removal when:
- It is already loose.
- It slides freely from an undamaged pocket.
- Flexible photo corners release it easily.
- No adhesive is present.
- The print remains flat and fully supported.
Do not remove it when:
- The page moves with the photograph.
- The print bends while the attachment point stays fixed.
- You hear cracking or tearing.
- Adhesive stretches or lifts paper fibres.
- The surface sticks to a plastic overlay.
- The album page is brittle.
- Part of the image layer has begun to separate.
- You cannot see how the photograph is attached.
Scan First, Investigate Later
Even when you plan to rehouse the photographs, capture the original pages before changing anything. This provides a record of the album’s arrangement and protects against losing handwritten information.
It also means that if a removal attempt is abandoned, you still have a digital copy of the intact page.
Do not use:
- A hairdryer.
- Steam.
- An iron or heated tool.
- Lighter fluid or household solvents.
- Cooking oil.
- Water.
- Adhesive removers.
- Sharp blades.
- Dental floss pulled behind the print.
Some separation techniques used by trained conservators rely on detailed knowledge of photographic processes, adhesives and solvents. That does not make them safe DIY methods. An incorrect treatment can produce damage that is immediate, delayed or impossible to reverse.
Flatbed Scanner, Camera or Smartphone: Which Is Best?
The right equipment is the method that captures sufficient detail without placing the album under physical stress.
| Capture method | Best suited to | Main advantages | Main limitations |
|---|---|---|---|
| Flatbed scanner | Albums that open comfortably and have fairly flat pages | Even illumination, consistent scale and good fine detail | Requires the page to face down; can strain thick or rigid bindings |
| Camera on copy stand | Fragile, oversized, thick and self-adhesive albums | Album remains face-up; flexible positioning; reduced binding pressure | Requires careful alignment, lighting and camera stability |
| Smartphone on a fixed mount | Small collections and practical access copies | Convenient, fast and widely available | Greater risk of distortion, glare, inconsistent colour and camera shake |
| Handheld photography | Emergency reference only | Minimal equipment | Difficult to keep square, sharp and consistently lit |
| Sheet-fed scanner | Loose modern prints only, if specifically designed for photographs | Fast for suitable batches | Completely unsuitable for bound albums and risky for delicate originals |
When a Flatbed Scanner Works Well
Choose a flatbed scanner when the album:
- Opens without strain.
- Has flexible pages.
- Fits on the scanning bed.
- Contains photographs mounted flush to the page.
- Has no fragile three-dimensional additions.
- Can be supported while one page rests on the glass.
A scanner provides predictable illumination and keeps the capture plane flat. It can produce excellent results for robust albums when used patiently.
Never push down on the cover to flatten the page. Allow the scanner lid to rest naturally. If the lid does not close, block stray room light with a clean, lightweight, opaque cloth without placing pressure on the book.
Support the part of the album hanging beyond the scanner. A stable box, book support or stack of clean boards can bring the closed side level with the scanning surface. Do not leave the full weight suspended from the spine.
When Overhead Photography Is Safer
Use a camera mounted above the album when:
- The binding opens only part-way.
- The pages are brittle.
- The album is too large for the scanner.
- Plastic overlays create contact marks.
- The book contains thick decorations.
- You need to capture folds, inserts or raised objects.
- Turning the album face-down would be unsafe.
The National Archives allows researchers to photograph vulnerable documents but emphasises that safe handling takes priority, pages should be turned individually and the original order must be retained. Those principles transfer well to a family album project. (The National Archives)
Is a Smartphone Good Enough?
A recent smartphone can produce useful copies when it is mounted securely, positioned parallel to the page and used with even lighting. It is far better than leaving a collection undigitised because you do not own specialist equipment.
However, a handheld phone often introduces:
- Perspective distortion.
- Soft corners.
- Reflections.
- Uneven exposure.
- Automatic sharpening.
- Inconsistent colour.
- Shadows from the photographer.
- Reduced detail in small photographs.
For a preservation project, use a phone holder, tripod arm or copy stand rather than holding the device. Select the highest-quality capture setting available, disable the flash and avoid digital zoom.
A phone-scanning app may automatically straighten pages and remove glare, but keep the original camera files as well. Automated processing can crop handwriting, alter colour or erase details it mistakes for blemishes.
Prepare a Safe Digitisation Workspace
The ideal workspace is clean, dry, uncluttered and away from food, drinks, pets, smoke and direct sunlight.
You will need:
- A large stable table.
- Clean, dry hands or suitable gloves.
- A soft brush designed for photographic or optical use.
- A lint-free cloth for scanner glass.
- A scanner, camera or smartphone mount.
- Diffused lighting for camera capture.
- Supports for the album covers and spine.
- A computer with sufficient free storage.
- A notebook or digital inventory.
- A separate drive for backup.
- Clean paper or board for temporary support.
Keep drinks on another table. A cup placed “well away” from the album can still be knocked over by a cable, sleeve or tripod leg.
Work in short sessions. Tiredness encourages rushed page turns, missed files and inconsistent naming. A large project is safer when divided into clearly recorded batches.
Cleaning the Album and Equipment
Clean the scanner glass before every session and check it periodically. Dust on the glass will appear in the same position across multiple scans.
Use a clean lint-free cloth suitable for optical surfaces. Apply cleaning fluid to the cloth rather than spraying it directly onto the machine, and allow the surface to dry fully before placing the album on it.
Do not polish, wash or chemically clean old photographs before scanning. Remove only loose surface dust that lifts with no pressure. If dirt appears embedded, sticky or connected to a flaking area, leave it alone.
Compressed air can propel debris across a delicate surface and some aerosol products may release liquid propellant. A soft brush used with the photograph fully supported offers greater control.
How to Digitise a Photo Album Step by Step
The following workflow suits most household albums, although fragile or contaminated collections may require specialist care.
1. Create an Inventory
Give each album a simple identifier before beginning.
For example:
ALB001 – Grandparents and Early FamilyALB002 – Cornwall HolidaysALB003 – Wedding and Honeymoon
Record:
- The album title.
- Approximate date range.
- Number of pages.
- Visible damage.
- Loose items.
- Blank pages that contain meaningful captions.
- The chosen capture method.
- Any pages that need special attention.
Photograph the front cover, back cover, spine and any title page. These images help preserve the identity of the physical object and make the digital archive easier to understand.
2. Record the Original Order
Start at the front and work sequentially. Do not jump between “interesting” pages.
Capture blank pages where they form part of the sequence, especially if they contain dates, writing, adhesive marks or evidence that a photograph is missing.
If an insert falls out, note exactly where it came from. Place a numbered slip beside it for the capture rather than writing directly on the item.
3. Choose a Consistent Capture Plan
Decide whether you will capture:
- Each single page.
- Each two-page spread.
- Individual photographs.
- All three.
Single-page images usually offer more detail and are easier to crop. Two-page spreads show how facing pages relate to each other. Important albums may justify both.
Write down your settings so every session remains consistent.
4. Support the Album Correctly
For scanner capture, support the closed side so it remains level with the scanner bed. Position only the target page on the glass and stop if the spine tightens.
For overhead capture, use clean wedges, foam supports or folded archival-quality board beneath the covers. The aim is to support the natural opening angle, not force the book into a perfectly flat position.
Keep supports clear of the photographed area and make sure nothing presses against loose decorations.
5. Capture a Reference Image
Before processing the whole album, digitise one representative page containing:
- A dark photograph.
- A light photograph.
- Handwriting.
- Fine detail.
- Glossy or reflective material.
Inspect the result at full size on a computer. Do not judge quality only from the scanner preview or phone screen.
Check:
- Is small handwriting legible?
- Are faces sharp?
- Are highlights washed out?
- Do dark clothes retain detail?
- Is the page square?
- Are the colours believable?
- Is glare hiding part of a photograph?
- Has the software cropped the edges?
Correct the setup before continuing.
6. Capture Every Page Methodically
Keep the page parallel to the sensor or scanner glass. Include a narrow border around the page so you can see that nothing has been cropped accidentally.
For an overhead camera:
- Position the lens directly above the centre.
- Check that all four page edges appear parallel.
- Use a low ISO setting where practical.
- Use a timer or remote release to prevent movement.
- Keep the camera height unchanged.
- Place lights at matching angles on both sides.
- Disable direct flash.
- Shield the setup from window light that changes during the session.
For reflective pages, move the lights further to the sides rather than tilting the camera. Tilting may remove one reflection but introduces perspective distortion.
7. Check Each File Before Turning the Page
Confirm that the file opens and is sharp before moving on. This may feel slow, but discovering a missed or blurred page after the album has been returned to storage is slower.
Pay particular attention to:
- Fold-out pages.
- Loose photographs.
- Captions close to the binding.
- Plastic overlays.
- Dark prints.
- Pages with several small photographs.
- Items partly hidden beneath another object.
8. Name Files as You Work
A consistent naming structure prevents confusion:
AlbumID_PageNumber_ItemNumber_Description
Examples:
ALB001_P001_CoverALB001_P002_Title_PageALB001_P014_Full_PageALB001_P014_IMG01_Birthday_PartyALB001_P014_IMG02_Grandparents
Use leading zeros so computers sort files correctly: P001, P002, P003 rather than P1, P2, P3.
Avoid characters that can cause compatibility problems, such as slashes, colons and question marks.
For a large collection, the practical workflow for organising high-volume family photographs offers further guidance on planning batches before file naming becomes unmanageable.
What Resolution Should You Use?
Resolution should reflect the size of the original and what you want to do with the file. More pixels can help when cropping a small photograph, but an extremely high setting cannot recover detail that is not present in the print.
| Material | Practical starting point | Reason |
|---|---|---|
| Complete album page for screen viewing | 300–400 ppi at original page size | Suitable for reading layouts and captions on screen |
| Complete page containing several small prints | 600 ppi | Provides more detail for later crops |
| Standard individual photographic print | 600 ppi | Strong balance between detail and file size |
| Small contact print or miniature image | 800–1200 ppi | Adds pixels for enlargement and closer inspection |
| Oversized page photographed with a camera | Capture at the camera’s full useful resolution | Final detail depends on sensor resolution, lens and framing |
| Quick access copy | Lower-resolution JPEG derived from the master | Easier to share without replacing the archival file |
PPI describes the pixel sampling of the digital image, while DPI more properly refers to output dots in printing. Scanner software commonly labels input resolution as DPI, so both terms appear in everyday scanning guidance.
Do You Need the Maximum Scanner Setting?
No. Scanner specifications may advertise very high interpolated resolutions. Interpolation creates additional pixels mathematically; it does not necessarily capture additional physical detail.
Use the scanner’s genuine optical capability and inspect a test scan. For most ordinary photographic prints, 600 ppi provides a practical preservation master. Small photographs and detailed crops may justify 1200 ppi when the scanner captures real additional detail.
Scan Black-and-White Photographs in Colour
Capture black-and-white and sepia prints in colour unless you have a specific technical reason not to. Colour capture records:
- Paper tone.
- Staining.
- Fading patterns.
- Hand colouring.
- Ink annotations.
- Subtle surface differences.
You can create a neutral monochrome copy later while retaining the more complete master file.
8-Bit or 16-Bit Capture?
An 8-bit-per-channel file is sufficient for normal viewing and many household projects. A 16-bit-per-channel capture stores more tonal information and may withstand stronger colour or exposure adjustments, but it creates larger files and requires software that supports the workflow.
Consider 16-bit TIFF masters when:
- The photographs are badly faded.
- You expect substantial restoration.
- The album is historically important.
- Storage capacity is not a concern.
- You understand how to retain the higher bit depth during editing.
For routine family albums, a well-exposed 8-bit TIFF or maximum-quality JPEG may be more practical than a technically ambitious workflow that becomes too cumbersome to finish.
How to Control Glare, Shadows and Curved Pages
Glossy prints, plastic sleeves and self-adhesive overlays can reflect lamps, windows and the camera itself.
Start by turning off direct flash. Place two matching lights at roughly equal angles on either side of the album. Use diffusion to soften reflections, but ensure diffusers do not touch hot lamps or hang where they could fall onto the album.
If glare remains:
- Darken uncontrolled room lighting.
- Move the lights further from the camera axis.
- Raise the camera and use a longer focal length if available.
- Reposition reflective objects outside the capture area.
- Wear dark clothing to reduce reflections of the photographer.
- Take two carefully aligned exposures with the lights moved, then select the clearer version.
Do not place heavy glass over an album page to flatten it. Glass can add reflections, trap grit against the photograph and apply damaging pressure to raised items or a weak binding.
Curved pages are best managed by supporting the album’s opening angle and positioning the camera parallel to the average plane of the page. If text disappears into the gutter, capture an additional closer image from a safe angle rather than forcing the book wider.
Capture the Story, Not Just the Pictures
A photograph becomes more valuable when people, places and dates remain attached to it.
As you work, record information from:
- Handwritten captions.
- Notes on the back of removable prints.
- Envelopes and processing wallets.
- Conversations with relatives.
- Newspaper cuttings.
- Dates printed on invitations or tickets.
- Photographer or studio marks.
- Clues in nearby photographs.
Do not rely on memory to add this information later. The person who recognises an aunt, neighbour, school or holiday cottage may not always be available.
Keep a spreadsheet or text document with columns for:
| File name | Approximate date | People | Place | Event | Source of information | Confidence |
|---|---|---|---|---|---|---|
| ALB001_P014_IMG01 | August 1978 | June, Alan, possibly David | Brighton | Family day out | Caption and family discussion | Medium |
Using a confidence field matters. It distinguishes a confirmed identification from an educated guess and prevents uncertain information becoming accepted as fact.
Here is Part 2, continuing directly from Part 1.
Choose File Formats That Suit Preservation and Everyday Use
The best file format depends on whether you are creating a long-term master, an editable working copy or a lightweight file for sharing.
A strong family archive usually contains at least two versions:
- A high-quality master file that remains untouched.
- A smaller access copy for everyday viewing, sharing and uploading.
| File format | Best use | Main strengths | Main limitations |
|---|---|---|---|
| TIFF | Preservation masters | Lossless, widely supported and suitable for editing | Large file sizes |
| JPEG | Viewing, sharing and printing | Compact, compatible and easy to manage | Uses lossy compression |
| PNG | Pages with text, diagrams or graphic elements | Lossless and widely compatible | Often larger than JPEG for photographs |
| RAW | Camera-based capture before processing | Retains extensive sensor data | Requires compatible software and later conversion |
| Browsing complete albums in page order | Convenient for reading a book-like sequence | Should not replace individual image masters |
TIFF for Archival Masters
TIFF is a practical choice for important master files because it can preserve image data without lossy compression. It also remains compatible with a wide range of photographic and archival software.
Use TIFF when:
- The collection is historically important.
- You plan to restore or edit photographs.
- Rescanning would be difficult.
- Storage space is available.
- You want a stable preservation copy.
TIFF files can be several times larger than JPEGs, especially at 600 ppi or in 16-bit colour. That storage cost is worthwhile for selected albums, but it may be excessive for a very large everyday collection.
JPEG for Practical Access
A high-quality JPEG suits most viewing, printing and sharing tasks. It opens on almost every phone, television, computer and photo service.
JPEG compression discards some image data, but a carefully saved high-quality JPEG can still look excellent. The key is to avoid repeatedly opening, editing and resaving the same file, as each lossy save can reduce quality further.
Keep the TIFF or original camera file as the master, then export JPEG copies for family use.
PDF for Recreating the Album Experience
A PDF can present pages in their original order and provide a convenient way to browse the album like a digital book. It works particularly well for complete page captures.
However, do not make PDF the only format. Retain the separate page images because they offer greater flexibility for future editing, migration and reuse.
A good structure might include:
- Individual TIFF page masters.
- Individual JPEG page copies.
- Cropped photograph files.
- One PDF containing the complete album.
Crop Individual Photographs Without Losing Context
Once every complete page has been safely captured and checked, you can create individual files from the photographs.
Always work on duplicates. Never crop, rotate or retouch the only master file.
How Much Border Should You Keep?
A tight crop looks neat, but removing every trace of the photograph’s physical edge can erase useful information. White borders, deckled edges, printed dates and photographer marks may help identify the period or process.
For a preservation crop, include the full print and a narrow surrounding margin.
For an attractive sharing copy, you can create a second version cropped closer to the image.
Straightening and Perspective Correction
A photograph captured from an album page may appear slightly tilted or trapezoidal. Use perspective correction carefully so that rectangular prints regain parallel edges.
Do not rely on aggressive automatic tools without checking the result. Software may:
- Trim part of the image.
- Distort people near the edge.
- Remove handwritten borders.
- Misidentify the album page as part of the print.
- Overcorrect photographs that were originally cut at an angle.
Keep a copy of the uncropped page so the original arrangement remains recoverable.
Should You Crop Captions Into the Photograph?
If a caption sits directly below a picture, create two files:
- An image-only copy.
- A contextual copy containing the photograph and caption.
This allows you to print or share the photograph cleanly while retaining the evidence that identifies it.
Restoration Should Follow Digitisation, Not Replace It
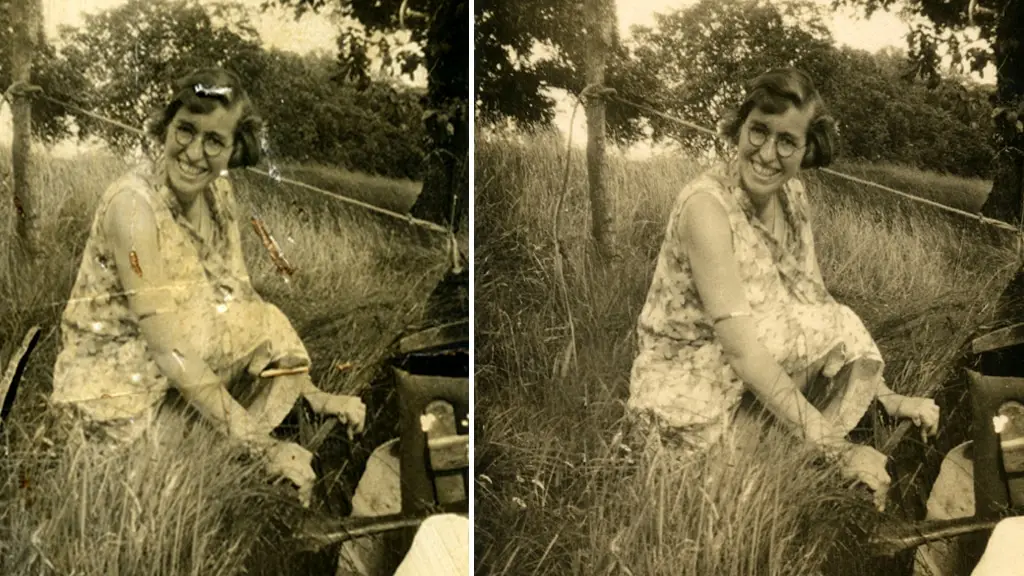
Faded colours, scratches, dust and creases can often be improved after scanning. The safest workflow preserves the untouched capture before any restoration begins.
Create three clearly separated versions where appropriate:
- Master: the original capture with no corrections.
- Corrected copy: basic rotation, crop, colour balance and exposure work.
- Restored copy: more extensive repairs or reconstruction.
This distinction matters because restoration involves judgement. Removing a scratch may be straightforward, but rebuilding a missing face, changing a sky or replacing damaged clothing can cross from restoration into interpretation.
Useful Basic Corrections
Reasonable non-destructive improvements include:
- Correcting rotation.
- Adjusting overall brightness.
- Restoring a natural black and white point.
- Reducing a colour cast.
- Applying gentle contrast.
- Removing isolated scanner dust.
- Correcting mild lens distortion.
- Producing a clean monochrome copy from a colour scan.
Avoid applying the same automatic correction to every image. A faded print, a flash photograph and a sepia portrait need different treatment.
When damage is extensive, careful reconstruction of faded or physically marked photographs may produce better results than aggressive one-click software.
Be Cautious With AI Enhancement
AI tools can sharpen faces, colourise monochrome images and generate missing detail. They can also invent eyelashes, teeth, textures, jewellery and facial features that were never captured.
Use AI-enhanced versions as optional interpretations, not as replacements for the original scan. Label them clearly so future family members understand that the image contains generated or inferred detail.
Build a Digital Filing System That Will Still Make Sense Later
A successful archive should remain understandable even to someone who did not create it.
Avoid storing thousands of files in one folder. Use a simple hierarchy that reflects the physical collection.
An example structure is:
Family_Photo_ArchiveAlbumsALB001_GrandparentsMastersAccess_JPEGsIndividual_PhotosAlbum_PDFNotes
ALB002_Wedding
Loose_PhotosNegatives_and_SlidesRestored_CopiesArchive_Index
Use Descriptive but Manageable Names
Good file names are:
- Consistent.
- Brief enough to read.
- Unique.
- Sortable.
- Free from ambiguous abbreviations.
A useful format is:
YYYY_Event_Person_Location_Sequence
For example:
1986_Christmas_Mary_and_Philip_Brighton_001
When the exact year is unknown, use:
circa_19601950sdate_unknown
Do not invent precision. An honest approximate date is more useful than an incorrect exact one.
Add Metadata Where Practical
Image metadata can hold:
- Names.
- Locations.
- Dates.
- Copyright information.
- Captions.
- Keywords.
- Album and page references.
Embedding metadata inside files makes it more likely that information will travel with the image when it is copied. However, some websites and messaging services strip metadata, so retain a separate catalogue as well.
A spreadsheet offers an accessible solution for most families. More advanced users may choose photo-management software that supports IPTC or XMP metadata.
Back Up the Archive Before You Consider the Project Finished
Digitisation does not automatically make memories safe. A single external drive can fail, be lost, stolen or accidentally reformatted.
Use the 3-2-1 principle:
- Keep at least three copies.
- Store them on two different types of media.
- Keep one copy in another location.
A practical family setup could be:
- Working copy on the main computer.
- Backup on an external hard drive.
- Encrypted cloud copy or another drive kept at a relative’s home.
The National Cyber Security Centre’s advice on protecting important files recommends keeping backups separate from the device containing the original data and checking that they can be restored.
Test Your Backups
A backup is only useful if it opens correctly.
At regular intervals:
- Connect the backup drive.
- Open a selection of files.
- Check the folder structure.
- Confirm that newly added material is present.
- Replace ageing or unreliable drives.
- Review cloud account access and recovery details.
Do not leave the only backup drive permanently connected to the computer. Malware, power faults and accidental deletion can affect connected storage too.
Use Checksums for Important Collections
A checksum is a digital fingerprint calculated from a file. If the checksum changes, the file has changed or become corrupted.
Checksum tools are useful for archives that need stronger integrity checking, particularly after copying files to a new drive. They are not essential for every household project, but they provide additional confidence for unique or historically important collections.
Preserve the Original Album After Scanning
Scanning does not remove the value of the physical album. In many cases, the original remains the most complete and authentic version.
Store it:
- In a clean, dry and stable part of the home.
- Away from direct sunlight.
- Away from radiators and hot pipes.
- Off the floor.
- Away from lofts, garages, sheds and damp cellars.
- In a protective box that fits without compressing it.
- Flat if the structure allows, especially if pages are heavy.
- With loose items supported and identified.
Avoid ordinary PVC sleeves, sticky tape, pressure-sensitive labels and acidic cardboard.
The British Library’s collection-care guidance explains that light, pollutants, poor handling and unsuitable environmental conditions can contribute to the deterioration of collection material. Stable storage will not reverse existing damage, but it can slow further change.
For a practical household approach, Supaphoto’s guidance on protecting ageing albums after they have been scanned covers handling, location and storage choices in more detail.
Do Not Seal Damp or Mouldy Material in Plastic
Plastic can trap moisture and worsen mould growth. If an album feels damp or smells strongly musty, isolate it from the rest of the collection and seek advice before enclosing it.
Likewise, do not place an album straight into cold storage or a freezer without specialist guidance. Emergency conservation techniques depend on the type and condition of the material.
DIY or Professional Photo Album Scanning?
DIY scanning gives you direct control and may suit a small, robust album. Professional help becomes more valuable as the collection grows, the pages become fragile or the technical requirements increase.
| Consideration | DIY approach | Professional approach |
|---|---|---|
| Collection size | Practical for one or two modest albums | Efficient for large or multi-album collections |
| Album condition | Best for robust, easily opened books | Better where careful support and handling are needed |
| Equipment | Limited by the scanner or camera you own | Access to dedicated capture equipment |
| Time required | Can involve many evenings or weekends | Reduces the owner’s scanning workload |
| File consistency | Depends on the operator’s workflow | Usually follows standardised settings and checks |
| Cropping | Often completed manually | May be available as part of the service |
| Quality assurance | Owner must inspect every file | Structured checking may be included |
| Fragile attachments | Greater risk if experience is limited | Better suited to experienced technicians |
| Personal involvement | Full control over every decision | Requires clear instructions and a trusted provider |
| Cost | Lower cash cost, higher time commitment | Higher financial cost, lower personal workload |
DIY Is Usually Suitable When
- The album is structurally sound.
- It opens comfortably.
- Photographs are flat and accessible.
- The collection is small.
- You already own suitable equipment.
- You have time to scan, name and check every file.
- You are confident creating backups.
Professional Help Is Worth Considering When
- Pages are brittle, warped or torn.
- Photographs are stuck beneath plastic.
- The binding cannot open safely.
- The album is oversized.
- There are several hundred or several thousand images.
- You need consistent individual crops.
- The collection includes mixed albums, prints, slides and negatives.
- You want colour correction or restoration.
- You cannot afford to repeat the work after a poor first attempt.
A specialist provider should explain how albums are supported, whether pages and individual photographs are both captured, what resolution is used, how files are named and how the originals are returned. For albums that are difficult to handle at home, a managed service for bound family collections can reduce the risks associated with flattening, dismantling and repetitive handling.
Questions to Ask Before Sending an Album Away
Ask the provider:
- Will the album be dismantled?
- How will fragile bindings be supported?
- Are complete pages captured?
- Can individual photographs also be supplied?
- What resolution and file formats are available?
- Is colour correction included or optional?
- How are files named and organised?
- What quality checks are carried out?
- How are originals tracked?
- How are the albums packed for return?
- Are blank or unscannable pages charged for?
- Can the order and captions be preserved?
Avoid choosing solely on headline price. A low per-image figure may exclude cropping, page capture, naming, colour work, storage media or return delivery.
Common Photo Album Digitisation Mistakes
1. Forcing the Album Flat
This can split the spine, loosen pages and place pressure on mounted photographs. Support the album at its natural opening angle instead.
2. Removing Every Photograph
Not all prints can be released safely. Preserve the page intact when adhesive, brittle mounts or plastic overlays resist movement.
3. Scanning Only the Pictures
Captions, page order and memorabilia provide historical context. Capture the complete page before creating separate crops.
4. Using Automatic Document Feeders
A sheet-fed or office document scanner can tear pages, scratch prints or jam on mounted material. Bound albums should never pass through an automatic feeder.
5. Accepting the First Scan Without Testing
A full album captured with poor focus, glare or incorrect colour may need to be repeated. Test a representative page and inspect it at full size first.
6. Using Excessive Compression
Small JPEGs may look acceptable on a phone but lack detail for restoration or printing. Create a high-quality master before exporting smaller copies.
7. Editing the Only Copy
Cropping and restoration should be performed on duplicates. Preserve the untouched original capture.
8. Trusting Automatic Face Enhancement
AI processing can invent detail. Keep enhanced images separate and clearly labelled.
9. Using Meaningless File Names
Names such as Scan0001 become difficult to interpret when several albums are combined. Include the album identifier and page number from the start.
10. Keeping Only One Copy
A single drive is not an archive. Maintain multiple checked copies in separate locations.
11. Discarding the Original Album
The physical object may contain information that no scan fully captures, including texture, construction, annotations and sequence.
12. Trying to Finish Too Quickly
Rushed handling leads to missed pages, inconsistent settings and accidental damage. Work in short, recorded sessions.
A Practical Quality-Control Checklist
Before closing the project, check the following.
Capture Quality
- Every page has been recorded.
- Covers, spine and title pages are included.
- Files are sharp at full size.
- No important edges have been cropped.
- Glare does not conceal faces or writing.
- Colours are reasonably consistent.
- Dark and light areas retain useful detail.
- Fold-outs and inserts have additional captures.
Organisation
- File names follow one structure.
- Page numbers match the album sequence.
- Individual crops link back to the source page.
- Names and dates are recorded separately.
- Uncertain identifications are labelled as uncertain.
- Restored files are separated from masters.
Preservation
- Master files remain untouched.
- Access copies have been created.
- At least two backups exist.
- One backup is stored elsewhere.
- Backup files have been opened and checked.
- The original album has been returned to safe storage.
Frequently Asked Questions About Digitising Photo Albums
Can You Digitise a Photo Album Without Removing the Pictures?
Yes. Complete pages can be scanned on a flatbed or photographed from above. Leaving pictures in place is often safest for pasted, self-adhesive, fragile and scrapbook-style albums.
What Is the Best Resolution for Album Pages?
A practical starting point is 300–400 ppi for complete pages intended mainly for screen viewing. Use around 600 ppi when pages contain several small prints that you intend to crop individually. Very small photographs may benefit from 800–1200 ppi.
Is 600 PPI Too High for Old Photographs?
No. For many ordinary prints, 600 ppi offers a useful balance between captured detail and file size. It may be unnecessary for a large page used only as a reference image, but it is sensible for individual photographs and pages that will be cropped.
Can I Use My Phone Instead of a Scanner?
Yes, particularly for an album that cannot safely lie flat. Mount the phone directly above the page, use even lighting, disable the flash and keep the device parallel to the page. A handheld photograph is less reliable because it introduces shake, glare and perspective distortion.
Should I Scan the Plastic Overlay?
Capture the page as found first. If the overlay lifts easily without disturbing the photographs, you may take a second capture with it raised. Do not peel back plastic that has stuck to a print.
How Do I Scan a Photo Close to the Binding?
Do not force the album open. Use overhead photography and take an additional close capture aimed safely towards the gutter. Correct mild perspective later while keeping the original page image.
Should Old Black-and-White Photographs Be Scanned in Greyscale?
Colour capture is usually preferable because it records paper tone, staining, fading and handwritten colour marks. A greyscale copy can be created afterwards.
Can I Clean Photographs Before Scanning?
Remove only loose dust with a soft, clean brush and minimal pressure. Do not use water, household cleaners, wipes, polish or solvents. Leave embedded dirt and sticky deposits for a conservator or restoration specialist.
Can Stuck Photographs Be Removed With Heat or Dental Floss?
These DIY techniques can tear the print, split its paper support or disturb the image layer. Capture the page intact and seek specialist advice if physical removal is essential.
Is TIFF Better Than JPEG?
TIFF is better suited to lossless master files and substantial editing. JPEG is more convenient for viewing, sharing and ordinary printing. Keeping both provides preservation quality and everyday accessibility.
Should I Save the Whole Album as a PDF?
A PDF is useful for browsing pages in order, but it should supplement rather than replace individual image files. Keep the page masters separately.
How Long Does It Take to Scan an Album?
The time depends on page count, condition, capture method, cropping and file organisation. A small album may take several hours, while a large or fragile collection can require several days of careful work.
Can Faded Photos Be Improved?
Yes. Colour balance, contrast and exposure can often be improved digitally. Severe fading or physical damage may require more detailed restoration. Always retain the unedited master.
Should I Keep Duplicate Photographs?
Yes, at least until the collection has been fully organised. Prints that appear identical may differ in crop, exposure, annotations or condition. Digitise meaningful variations and record true duplicates rather than discarding them prematurely.
What Should I Do With Loose Negatives and Slides Found in the Album?
Store them separately in suitable sleeves and record which page or event they relate to. Negatives and slides can contain more image detail than the corresponding prints, so they are worth digitising independently. A broader guide to recognising photographs, slides and album material can help identify mixed collections.
Can I Throw the Album Away After Scanning?
Usually, no. The physical album retains material, contextual and sentimental information. Keep it unless serious contamination, legal ownership issues or professional conservation advice justify another decision.
Final Decision: DIY or Professional Help?
Choose DIY when the album is stable, the project is manageable and you have suitable equipment, time and patience. A careful home workflow can produce excellent results.
Choose professional support when the collection is fragile, extensive, unusually constructed or too important to risk learning by trial and error. The value lies not only in image resolution but in controlled handling, repeatable capture, quality checking and organised delivery.
Whichever method you choose, the same principles apply:
- Preserve page order.
- Avoid unnecessary removal.
- Capture complete pages.
- Keep untouched master files.
- Record names and dates.
- Maintain several backups.
- Store the original safely.
To digitise a photo album properly is to preserve more than photographs. It protects the sequence, handwriting and family knowledge that turn separate pictures into a shared history. A deliberate process may take longer, but it produces an archive that remains useful, understandable and emotionally meaningful long after the original scanning session.